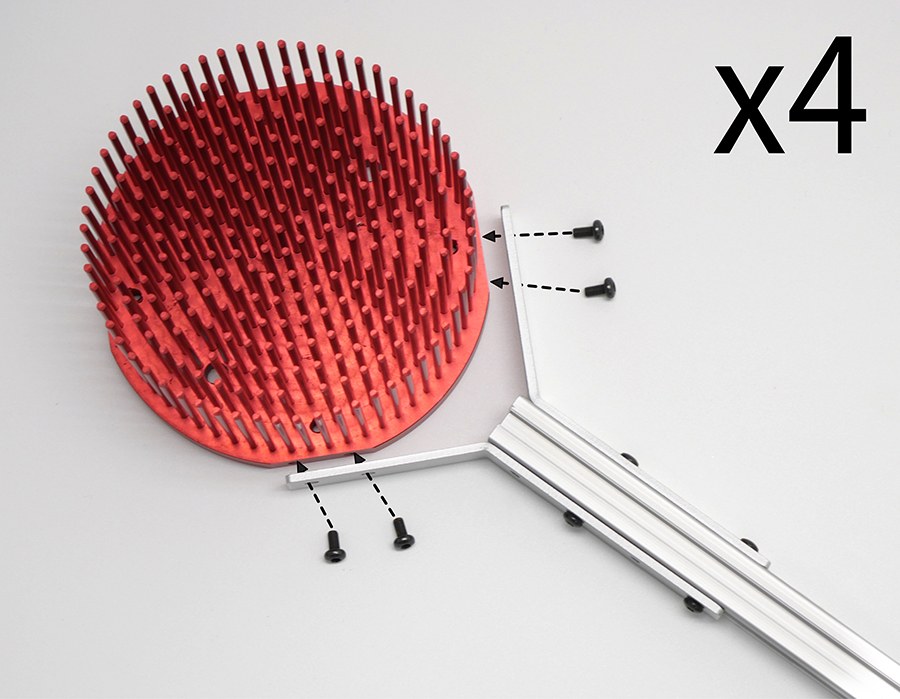
Step 1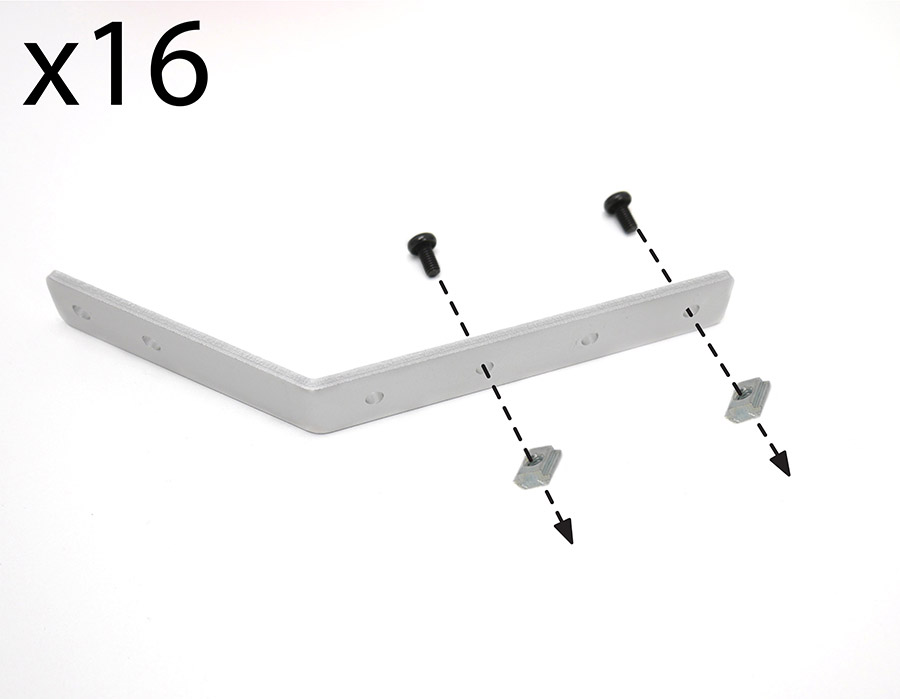

Insert 8mm M4 screws into brackets and loosely attach t-nuts to all screws
Step 2
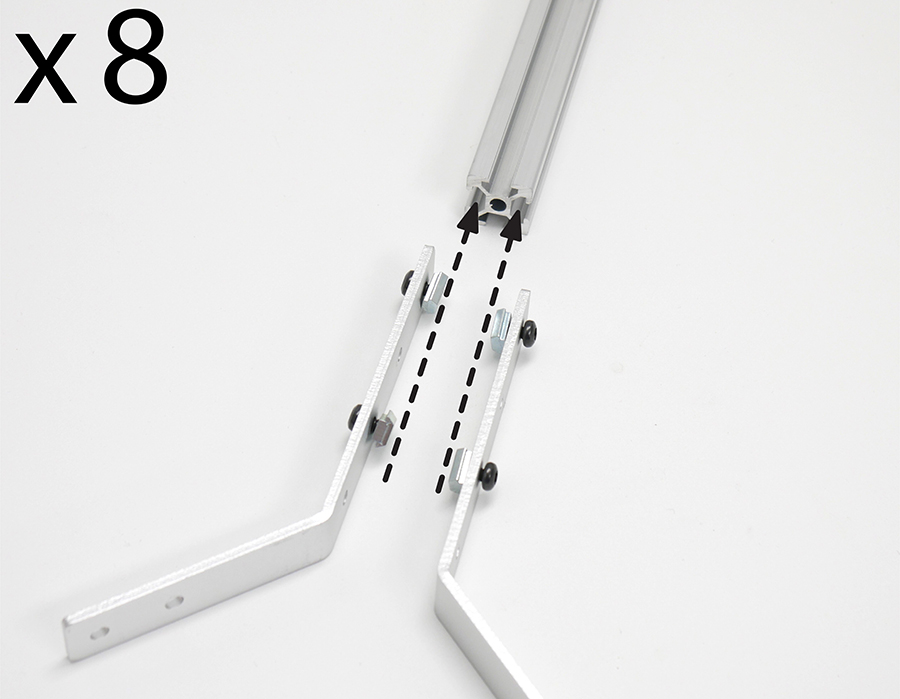
Slide brackets with screws and t-nuts into both ends of each extrusion.
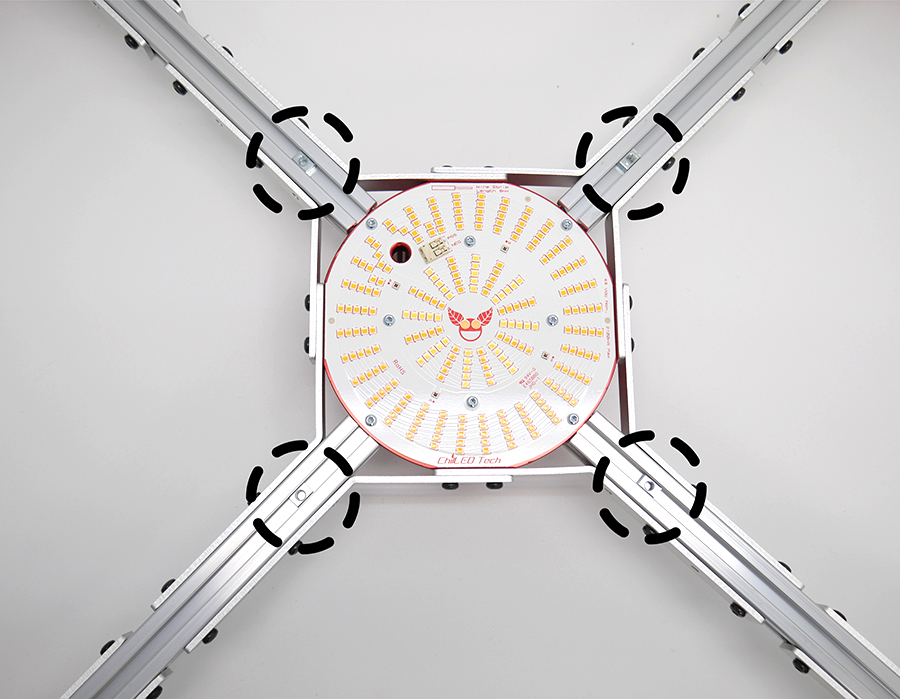
Step 3
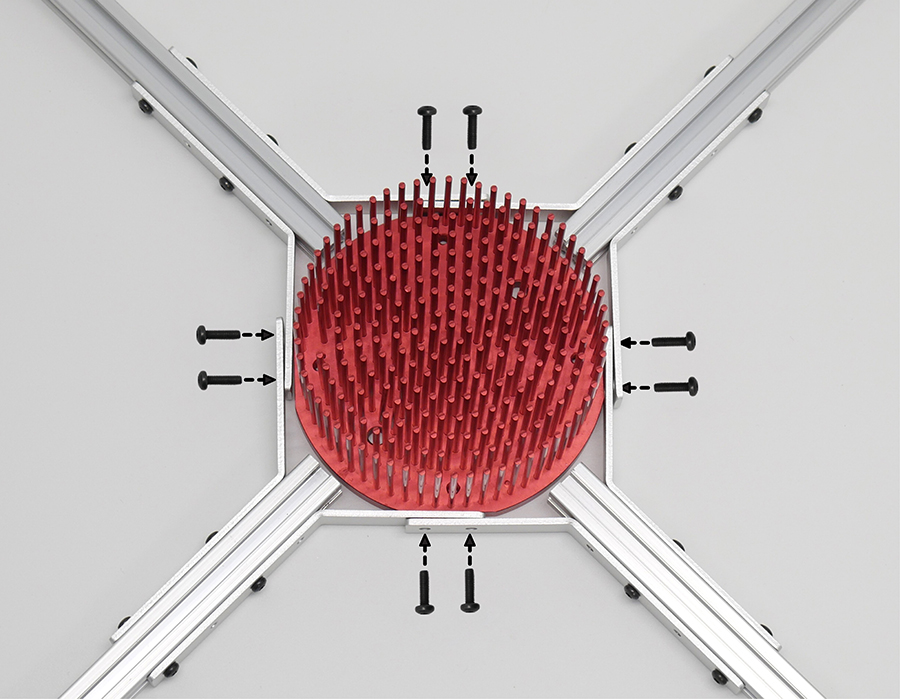
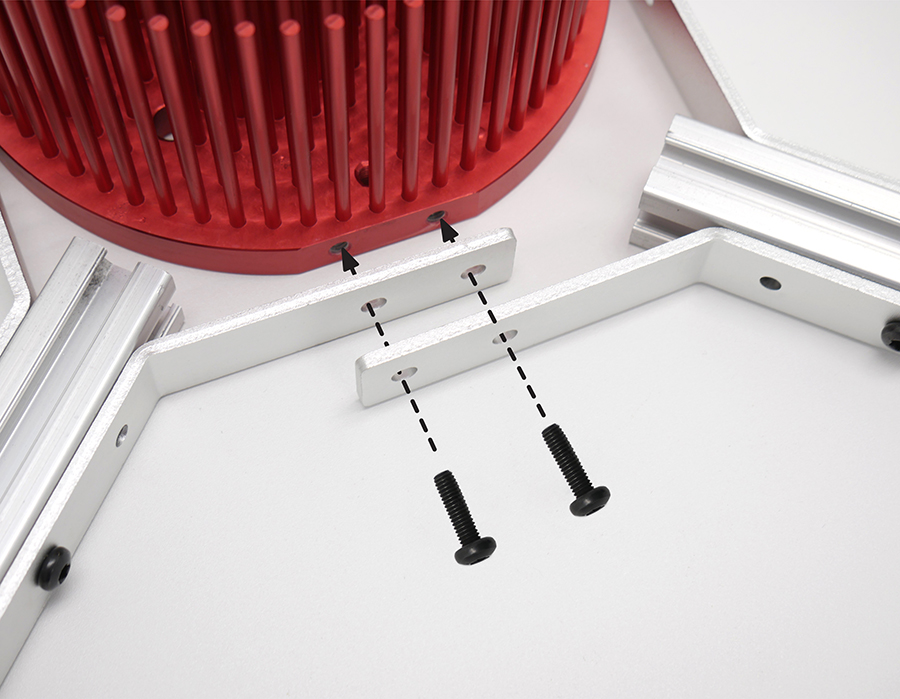
Use 14mm M4 screws to attach extrusions to center heatsink.
For this step, make sure that screws are kept loose to allow alignment of overlapping brackets.
Step 4
Insert T-nut into center of each extrusion (for step 6) and then attach outer heatsinks.
Step 5
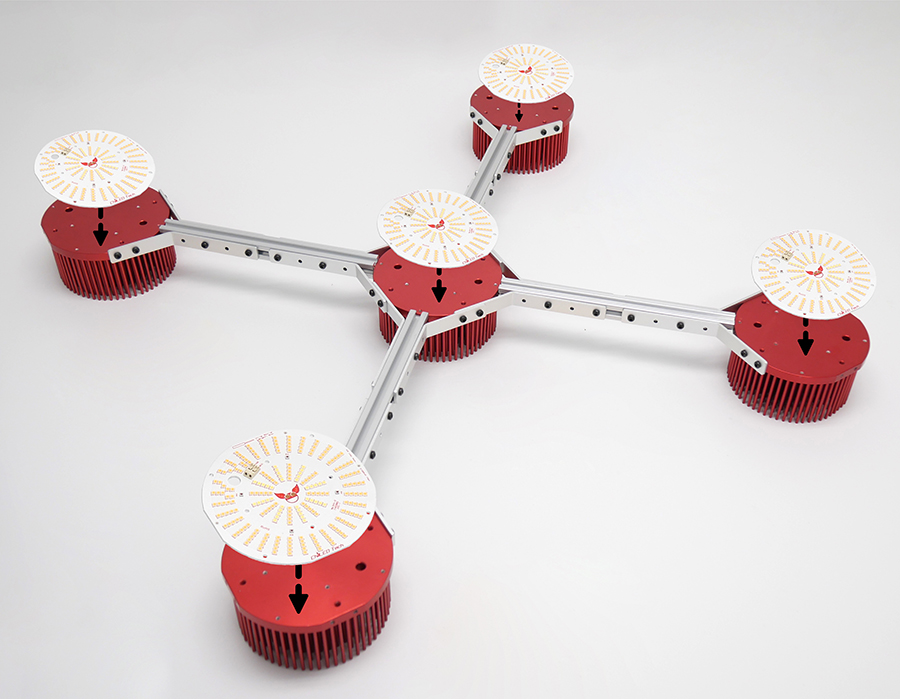
Use M3 pcb screws to mount Logic pucks to each heatsink.
Make sure that wire holes in pucks align with holes in heatsinks.
Step 6
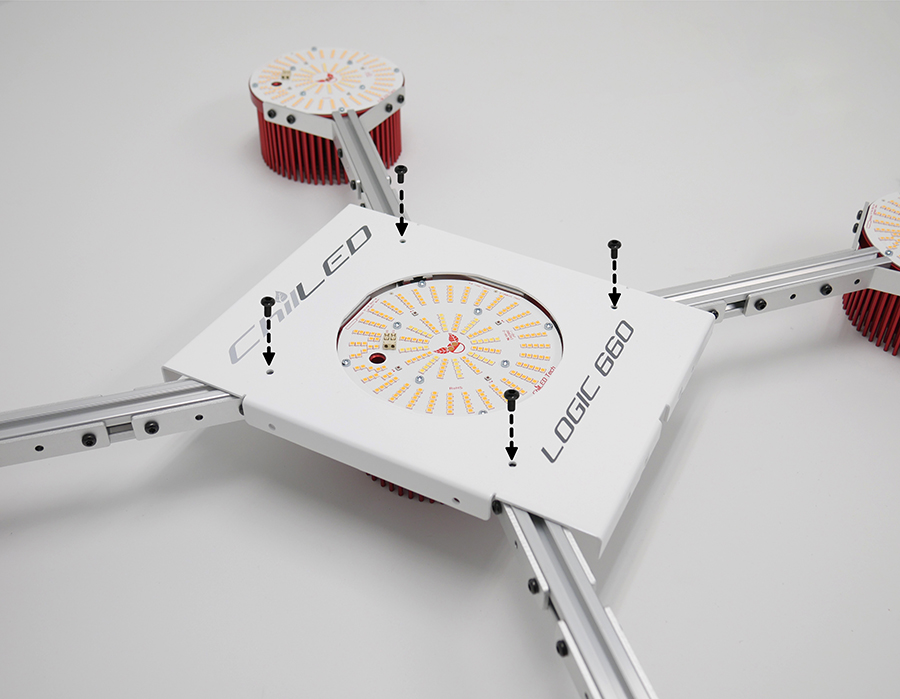
Mount beauty plate by aligning t-nuts with holes in plate and then inserting 8mm M4 screws.
Step 7

Run bare wires of harness through center heat sink hole and attach to connector on center puck.
Insert red wire into positive connector slot and black wire into negative connector slot.
Step 8
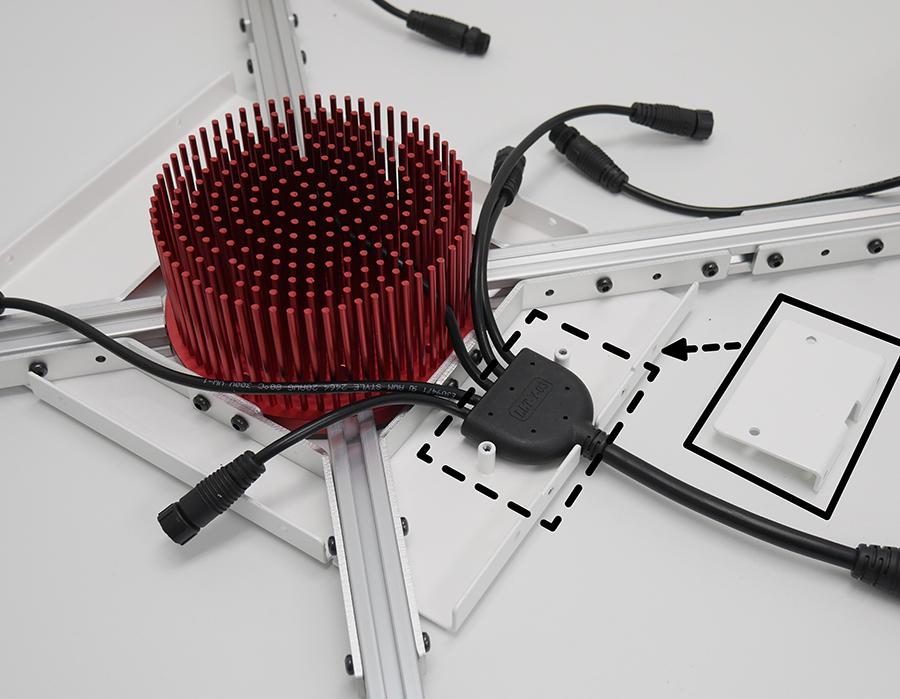
Attach harness plate using 8mm M4 screws
Step 9

Run wires through heatsink hole to attach wires to puck connectors on all four exterior heat sinks
Insert red wire into positive connector slot and black wire into negative connector slot.
Step 10
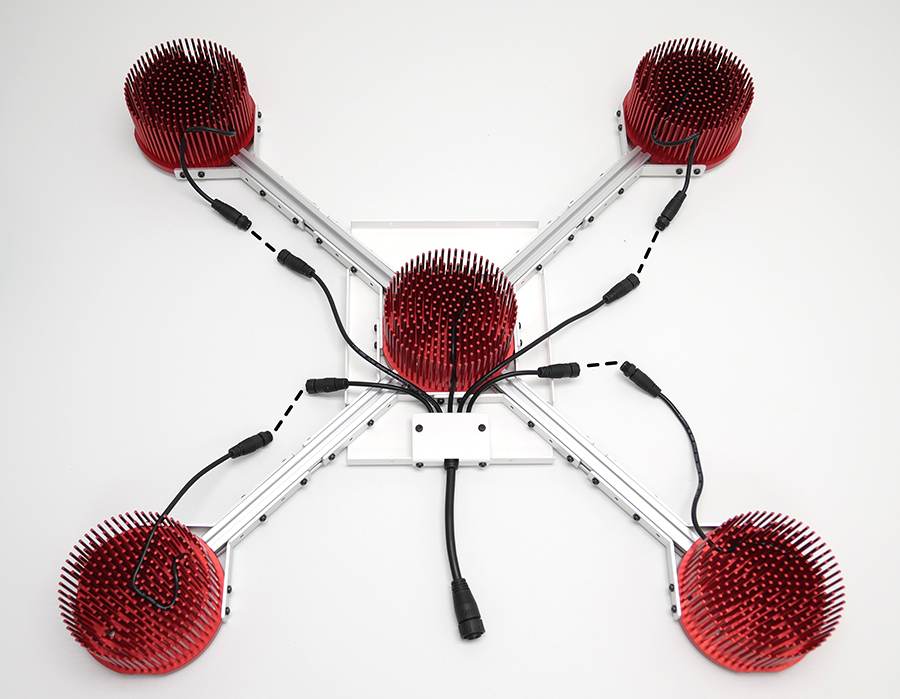
Connect outer wires to main harness.
Step 11
Give yourself a pat on the back for having completed this awesome build!
From there, just connect the harness to your driver and then hang it, plug it in, and have your mind blown.
